How to turn a pedal bike into a balance bike
This article is kindly sponsored by Hornit Bikes. It also contains affiliate links which mean when you buy through links on this page we may earn an affiliate commission
So you’ve just bought your child’s first pedal bike! It’s such an exciting milestone, and you're probably hoping they'll leap on it and start pedalling off into the distance.
But, as with everything to do with children, things don't always go according to plan!
What should you do if they don’t seem confident or ready to starting pedalling?
Do not despair, there is a quick and easy way around this.
Take the pedals off and turn it into a balance bike!
You don't need to spend even more money on one of the best balance bikes.
Taking the pedals off your child's bike is a simple way to help them gain more confidence on the bike.
They can get used to sitting on the saddle, scooting around and using the brakes to stop without the added complication of pedalling.
In this article we'll look at how to:
- decide if you should take the pedals off a pedal bike, or buy a balance bike instead
- take the pedals off a bike
- adjust the saddle ready for use as a balance bike
- put the pedals back on again
Which is better - taking the pedals off or buying a balance bike?
If this is your child's first time on a bike of any type, and they have an inside leg measurement of below 36cm we'd recommend using a balance bike first.
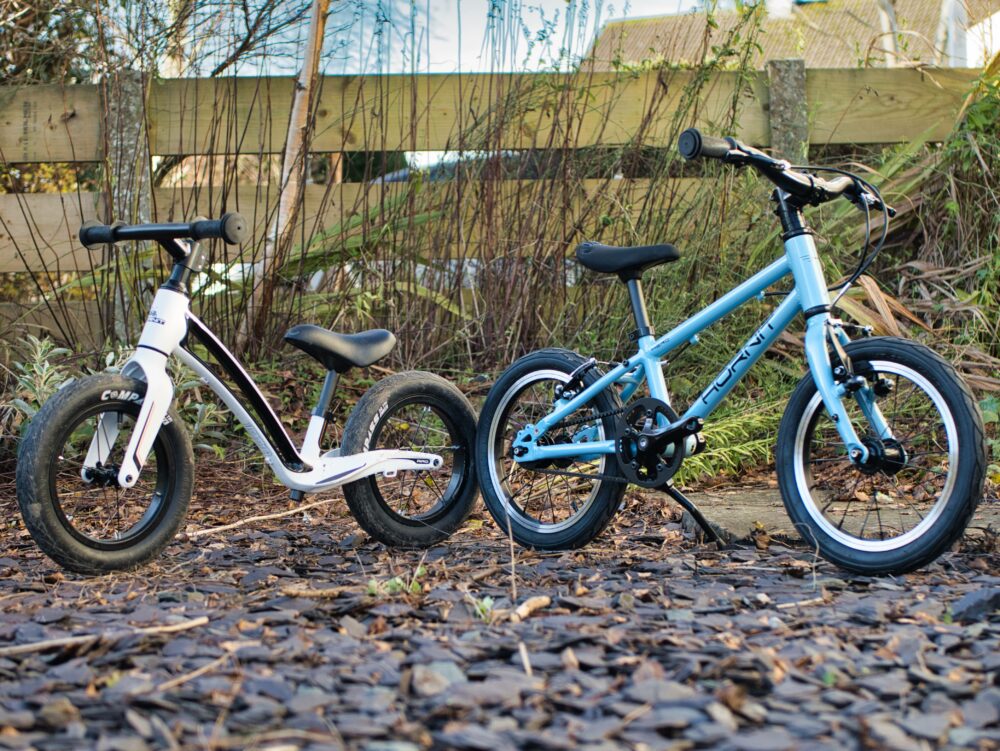
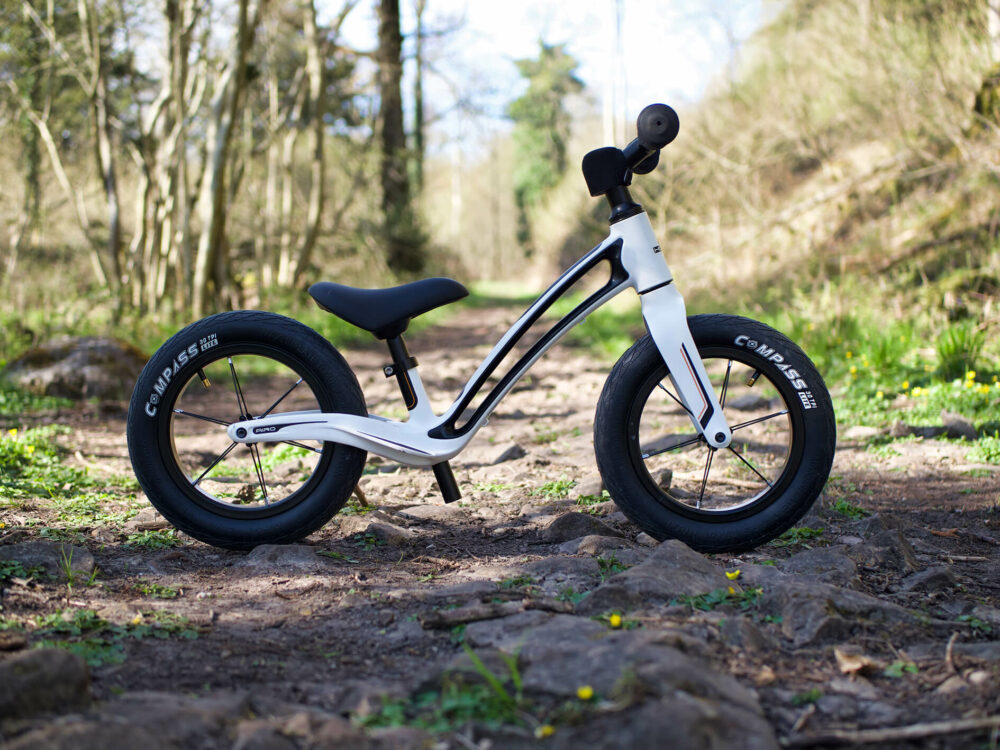
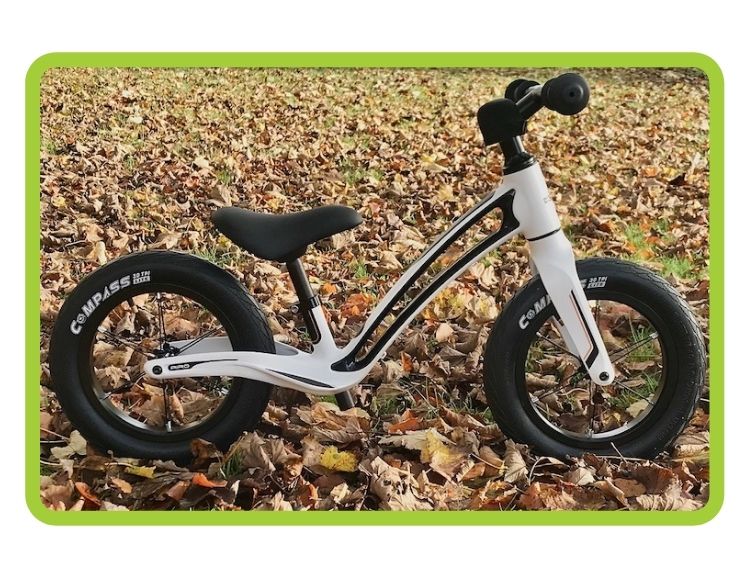
A balance bike, such as the Hornit AIRO, is a cheaper and lighter weight option than the equivalent pedal bike. They're designed specifically for smaller children to gain confidence on two wheels and are brilliant fun!
However, the vast majority of balance bikes have little 12" wheels and are designed for small children, so there comes a point when you need to think about moving them onto the next size bike.
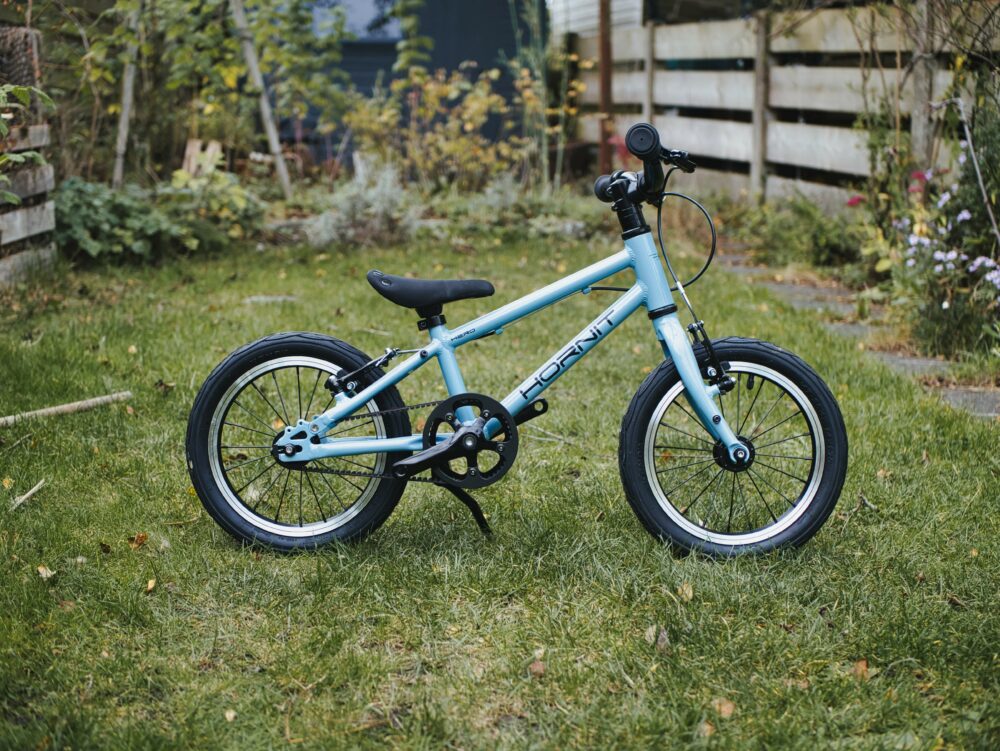
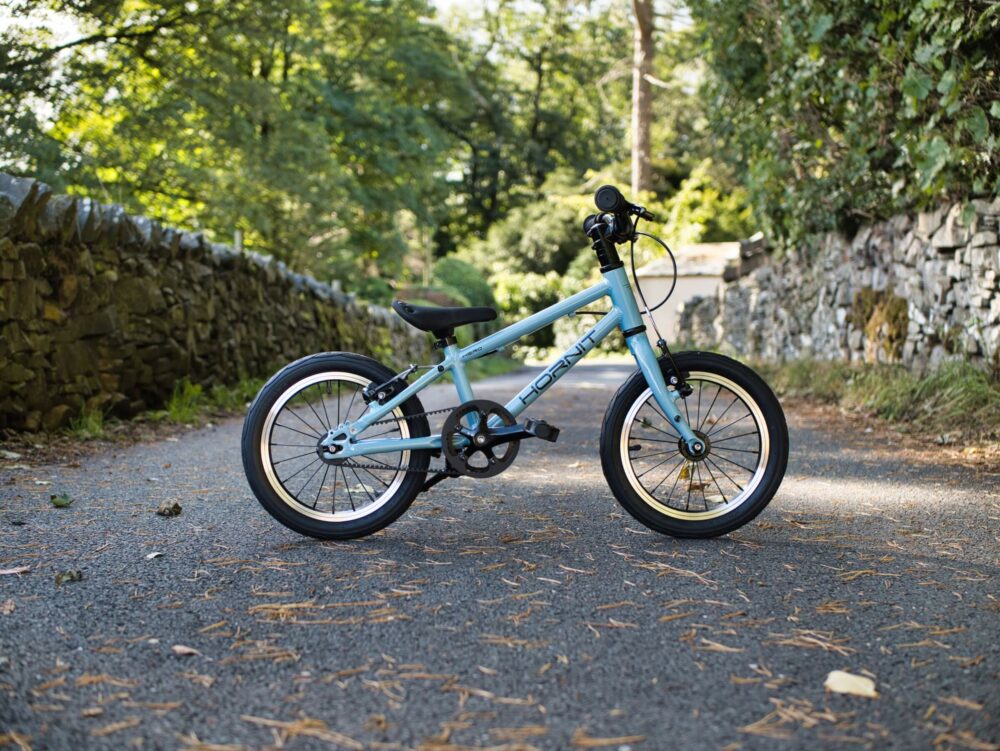
So for children aged about 4 years and over a pedal bike, such as the Hornit HERO, with the pedals removed can make more sense for a short time.
Please note, if your child has additional needs then you may wish to check out our article on larger balance bikes.
Why convert a pedal bike into a balance bike?
If this is your child's first bike and they haven’t used a balance bike before, the entire experience is going to be very new and strange. Some children are able to just leap onto a pedal bike and it clicks straight away - however, some may need more help.
After all, they need to master balancing, steering, pedalling and braking - it's a LOT to learn all in one go!
Some children can really benefit from removing the pedals to begin with to gain the balancing, steering and braking skills. Older children do tend to be able to move through this phase quicker than a much younger child, and are then ready to introduce pedalling.
If your child is moving up from a balance bike to a pedal bike they might find it overwhelming at first as the pedal bike looks and feels different.
It can really help if you initially use the pedal bike as a balance bike. This can give them the time and space to get used to the new bike whilst still giving them the ability to use it in the same way as their balance bike.
This can be a great way to transition from a balance bike to learning to pedal - and is often a quick phase to just regain confidence, especially if you're going up in size in the same range (for example from the Hornit AIRO balance bike to a Hornit HERO pedal bike).
When NOT to convert a pedal bike into a balance bike
If the bike is too big for your child - if they can't get their feet flat on the ground then they're not going to be able to balance properly. We recommend getting a smaller balance bike for them, or waiting until they've grown a bit
If the bike has a wide Q Factor - the Q Factor is horizontal distance between the pedals along the axis of the bottom bracket of a bike. Most quality kids bikes have a narrow Q Factor to help the pedalling motion. However some children's bikes have a much wider Q Factor, which basically means the cranks will stick out. This can cause your child will bash their shins on the cranks, which you don't want.
You can resolve this by removing the crank arms too, but this is a complicated procedure and we don't recommend this unless you're a competent bike mechanic with the correct tools.
Even on a bike with a narrow Q Factor the cranks do get in the way a bit, so this technique is not the perfect replacement for a balance bike. However as a way of getting a child familiar with a new bike it works pretty well for a short period of time.
How to remove the pedals from a child's bike to turn it into a balance bike
This may sound complicated, but don't worry - it's quite easy, so long as you turn things the correct way.
We'll walk you through step by step how to take the pedals off, and get the bike ready for using in balance bike mode.
Step 1: Remove the pedals
We do this to give the rider's legs enough space to pass the cranks (the bits the pedals are attached to) when scooting the bike.
This is important so your child can scoot without banging their legs on the pedals, which could potentially cause injury and at the very least just be really annoying.
What you'll need
- 15mm spanner or
- 6 or 8mm hex (Allen) key
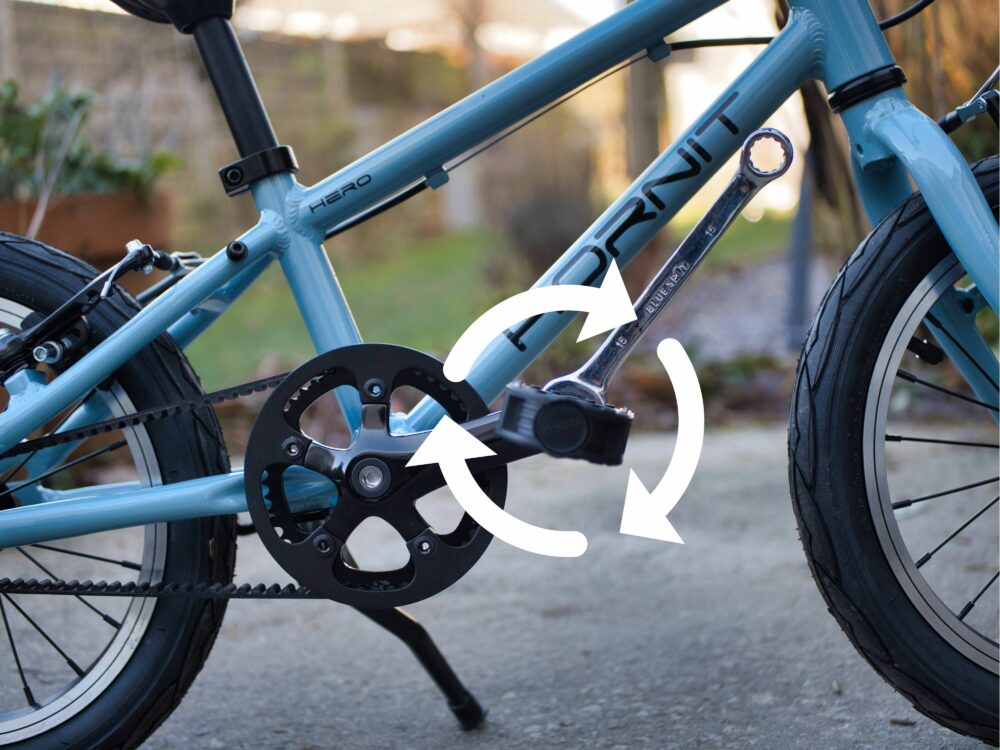
Pedals are usually removed with either a 15mm spanner located on the flats between the pedal body and the crank or more commonly an Allen key at the end of the pedal axle that threads into the crank.
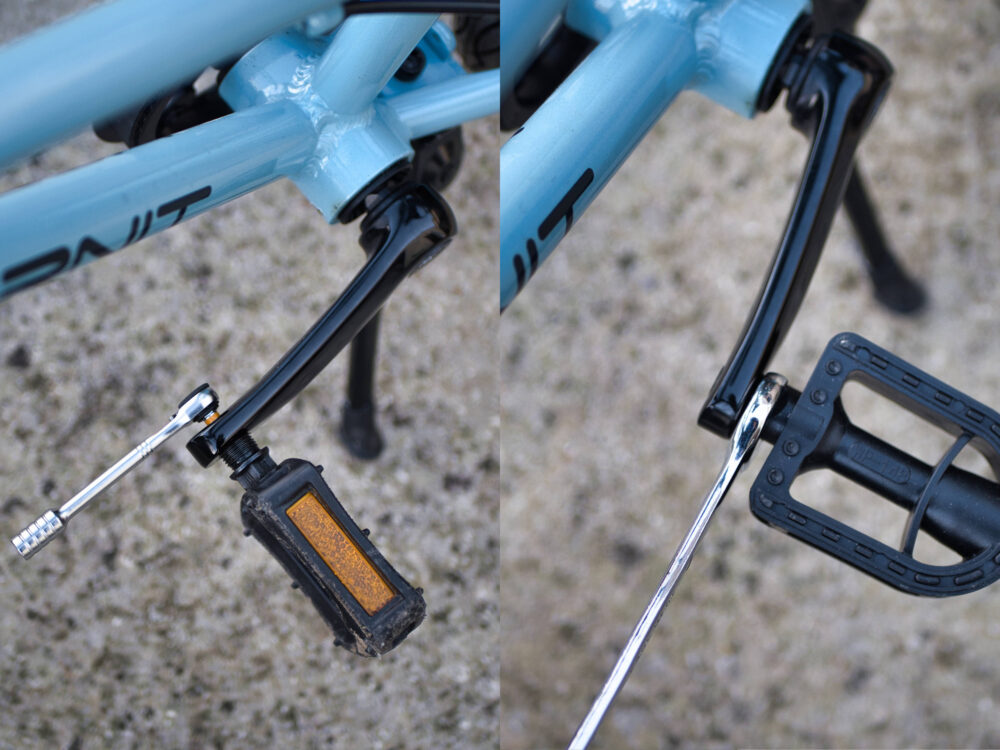
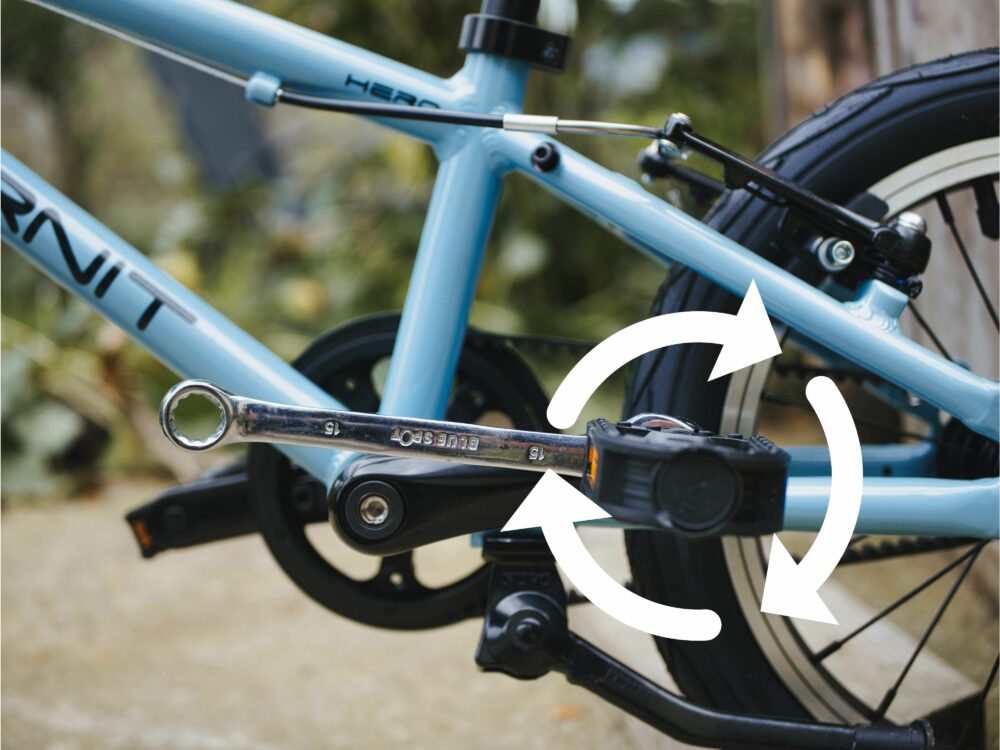
When loosening the pedals the non-driveside (i.e. the bit without the chain or belt drive) is turned clockwise
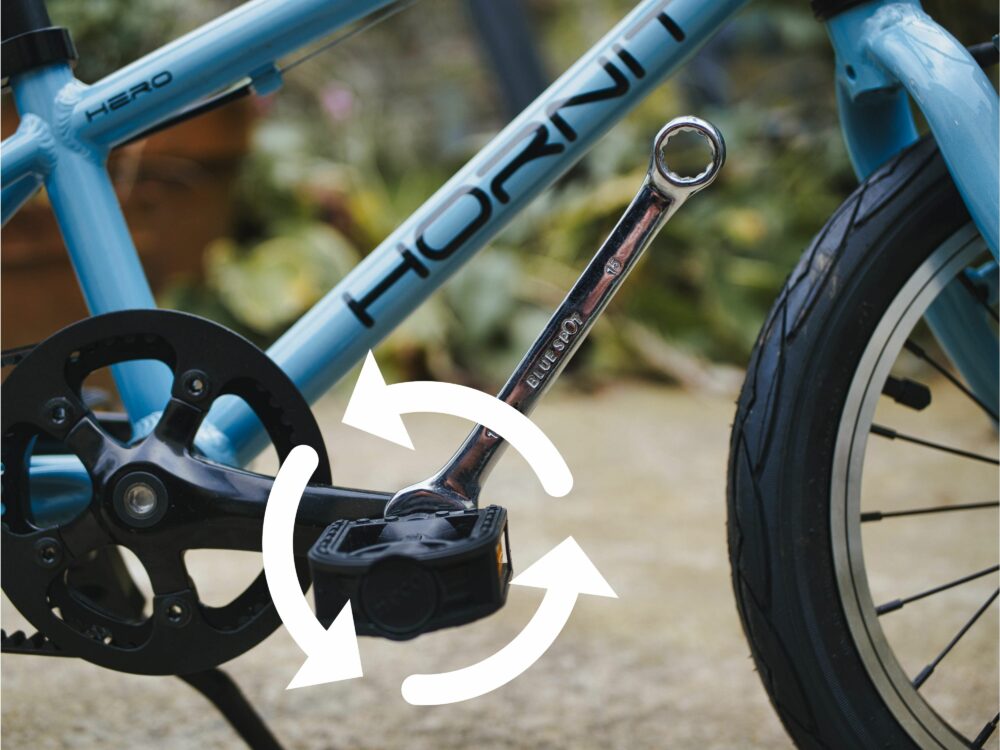
When loosening the pedals the drive side pedal (the one on the side with the chain or belt drive) is turned anti-clockwise
Step 2: Adjusting the saddle height for balance biking
Once the pedals are taken care of the next step is to get the saddle height correct.
This is really important as it differs to the saddle height for pedalling.
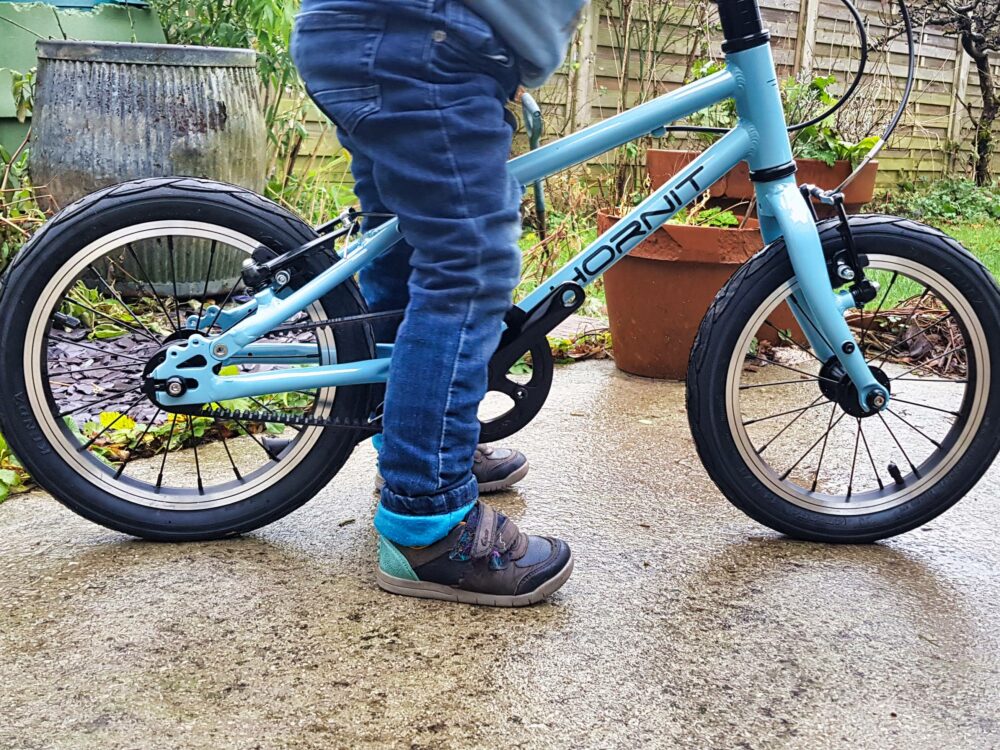
What you’re looking to do is raise or lower the saddle to the point at which the rider has their feet flat on the floor leaving a slight bend in the knee when seated.
This is to allow them to comfortably use their whole foot as they push through and extend their leg in order to propel themselves forward - they need to be scooting along the floor.
It’s important that this optimum saddle height is maintained as they grow or they'll get tired and frustrated - it's hard work scooting with a really bent knee!
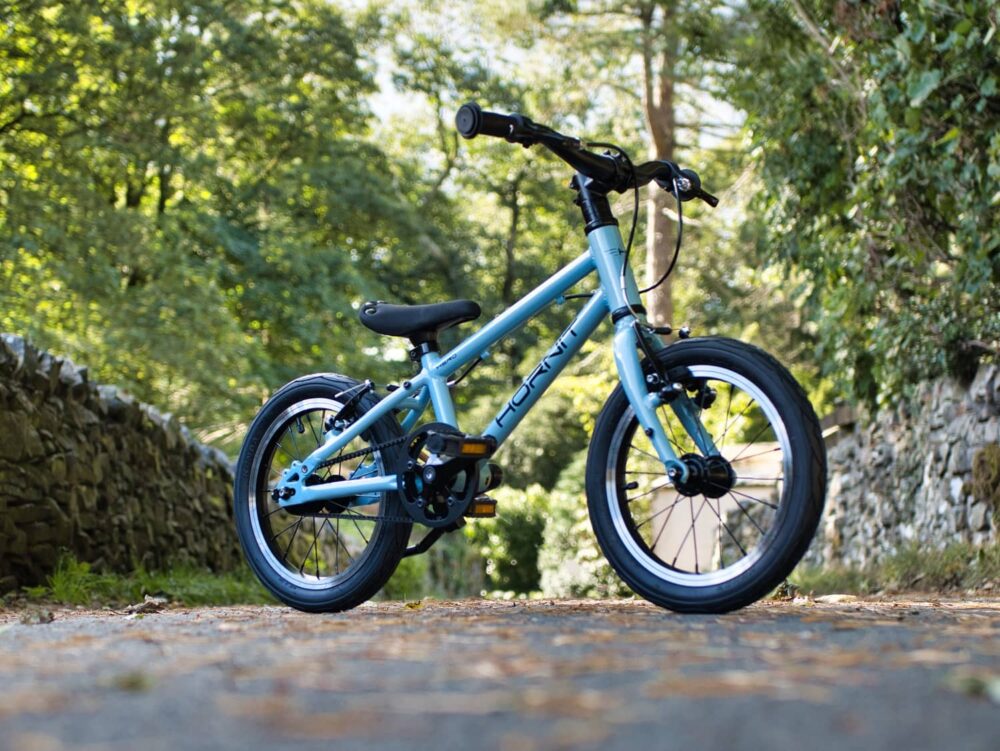
The photo shows how we set up the Hornit HERO 14 ready for this particular young Cycle Sprog to use it as a temporary balance bike.
When should I put the pedals back onto the bike?
Once your child has mastered the art of balance biking, you can pop the pedals back on and raise the saddle at the optimum pedalling height to attempt pedalling.
This session should be kept short (no more than 30mins) and fun.
If pedalling isn't happening don't worry. This is normal and it’s really easy to revert back to the balance bike setup.
It may take a few sessions to learn to pedal and is something that will happen when the time is right.
The ability to pedal and balance at the same time is a cognitive development and is not something that every child is ready for after one quick attempt. When the time is right it will happen - but it does take time and practise, and all children develop the skills at a different rate.
How to put the pedals back onto your child's bike when they've finished with it in balance bike mode
The most important thing to remember when putting the pedals back onto your child's bike is that the left and right hand pedals thread in different directions.
This is crucial and is the most common mistake made by people when putting the pedals back on.
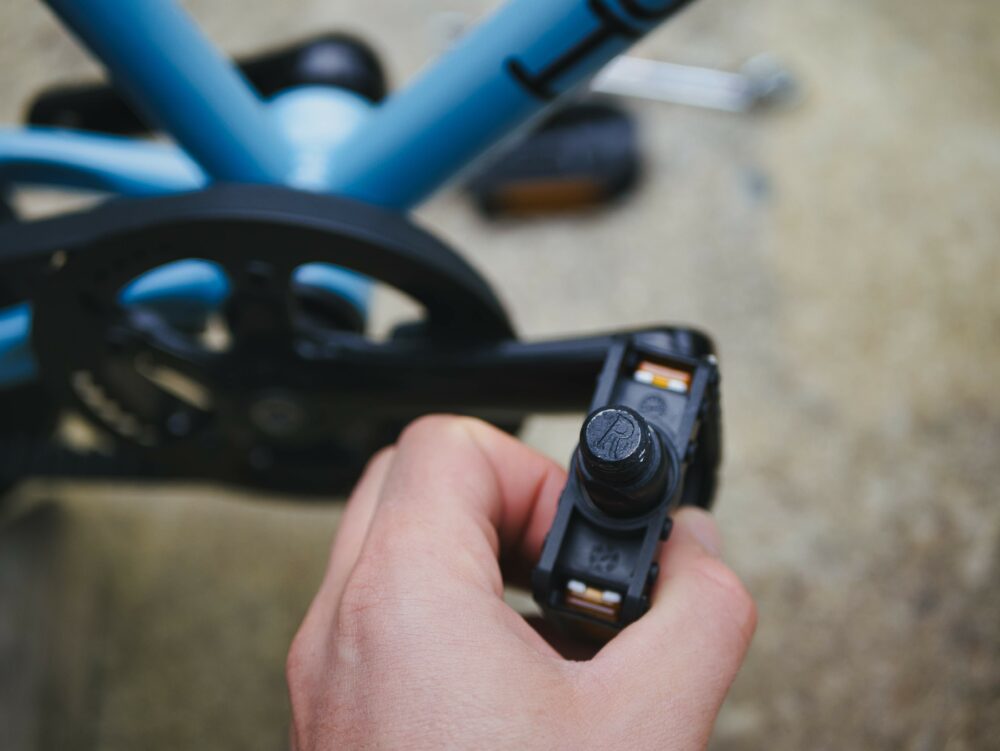
The pedals should have a letter on them, showing which goes on the left, and which on the right.
Remember, that this is the left and right as if you were sitting on the bike, not when you're looking at it front on!
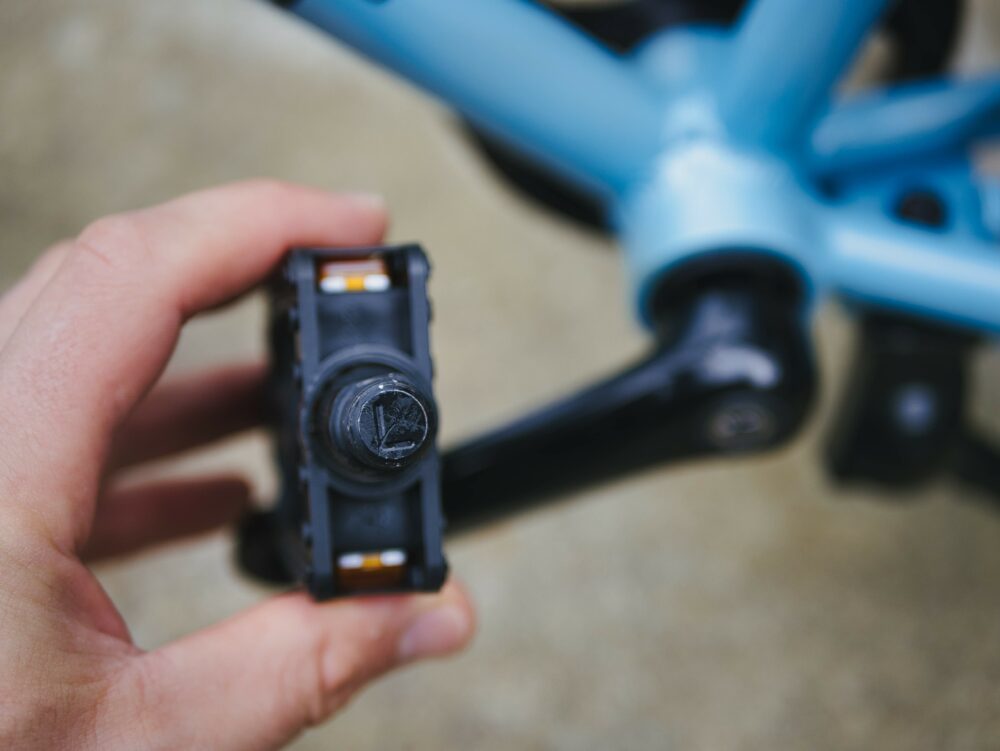
The non-driveside is threaded in an anti-clockwise direction
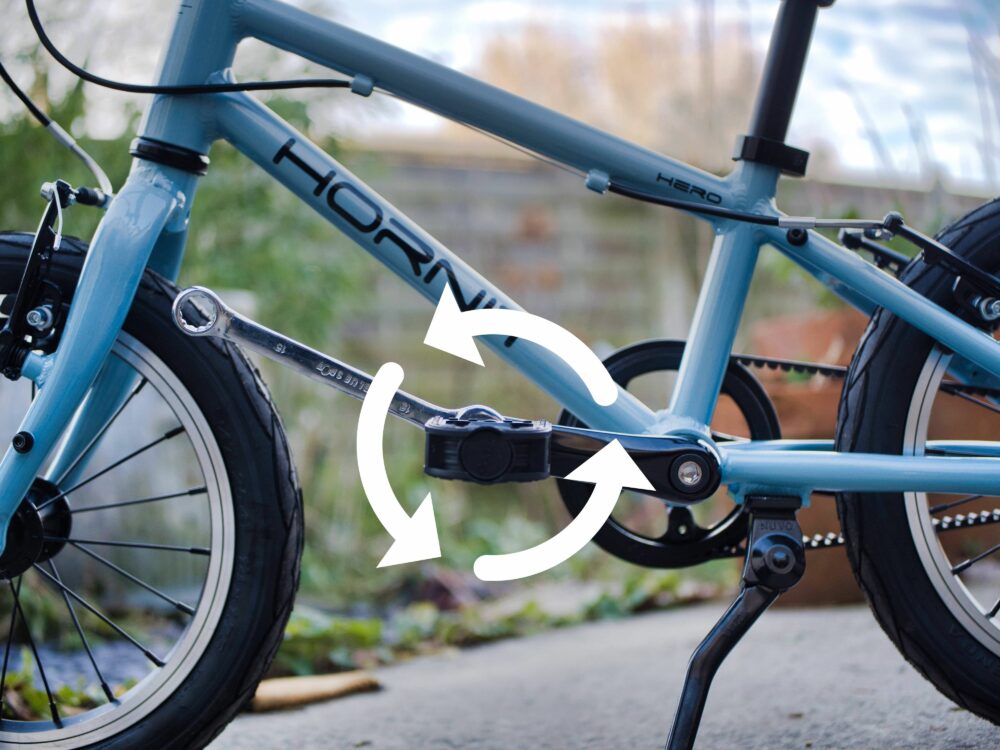
The drive side (side with the chain or belt on) is tightened by threading the axle in clockwise
It is worth putting some grease on the threads of the pedal before you screw it in so you can get them undone again in the future.
Make sure you get the pedal level inside the hole and start by screwing it in by hand, do not use a tool straight away. Don't tighten it up if it feels as if it's grating or catching at all - if you ruin the threads inside the crank it's an expensive trip to the bike shop!
If it doesn't feel right just gently remove the pedal and start again.
If you have a torque wrench then 30Nm is an appropriate force to use, but check manufacturers advice if unsure. Pedals do need to be tight as loose pedals can damage cranks.
So, there you have it - how to easily take the pedals off a pedal bike and set it up to be a balance bike, and how to put the pedals bike on again.
Don't forget to raise the saddle height slightly if necessary so it's positioned correctly for pedalling.
If you have any doubts about what you're doing, or don't have the correct tools, we recommend visiting your local bike shop.
Thank you to Hornit Bikes for sponsoring this article - they have a great range of kids pedal bikes and fun kids cycling helmets.
Where to ride
Recent posts
-
 YOMO 14 Review: Is this the perfect first pedal bike?
-
 BTWIN 16” Discover 900 First Impressions Review: A budget-friendly 16″ Decathlon bike
-
 BTWIN kids’ bikes: a comprehensive range overview
-
 3 incredible traffic-free family cycling routes in Austria & Italy
-
 BTWIN 500 Baby Helmet Review: the smallest bike helmet available in the UK
-
 The joy of cargo biking – How electric cargo bikes are transforming family life
-
 Hamax Zenith Relax Review: A reclining rear bike seat



Comments